Component 3: The Merged Documents
There are 3 steps to completing a Mail Merge process. Some of this
will seem like a review - but Mail Merge thinks you are starting here.
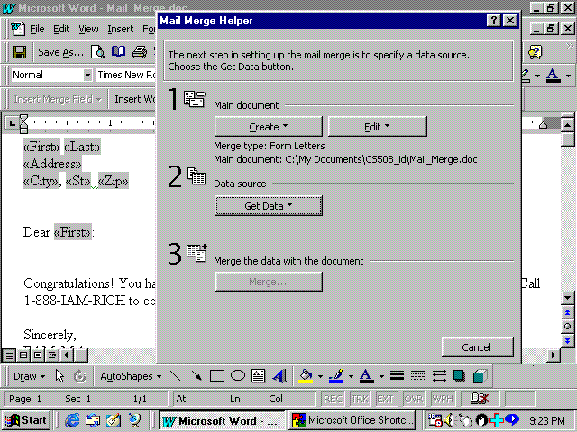
Step 1: Main Document
Create.
Good News! You have already completed Step 1. This was done when you imbedded the field codes. Mail Merge assumes you want to use the document you have open. The path to the Main Document is also displayed. Skip Step 1 and proceed to Step 2.
Step 2: Data Source
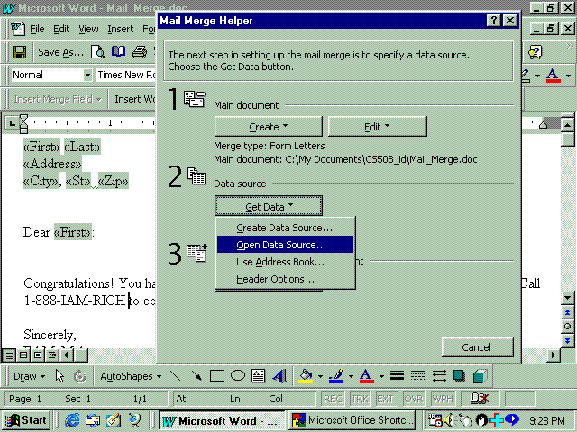
Get Data.
This box allows you to specify any Data Source. You want to use the Data Source you prepared earlier in Excel.
After the Data source and the Main Document have been linked-up,
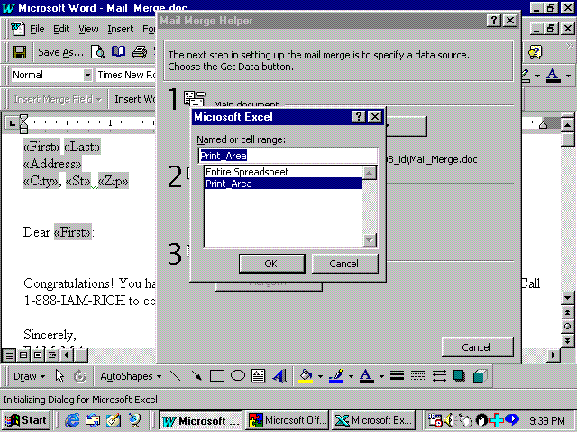
the Microsoft Excel "Named or Cell Range" will be displayed. As part of the preparation of the Data Source, you set the Print Area.
Do not click on "OK" yet, please read the following paragraph first.
Depending on the size of your Data Source, your PC will be locked up while the procedure
completes.
If your document is complicated, or your Data Source is very large, you
may want to close down any other open applications to speed-up the process.
Step 3: Merge the data with the document
Merge
After the "Get Data" process has completed you are ready for Step 3.
That's All There Is To It!
Do you feel proud? You Should!
Just one easy step left - completing the process by printing the documents.
Please send inquiries to
marilyn@hylandbay.com

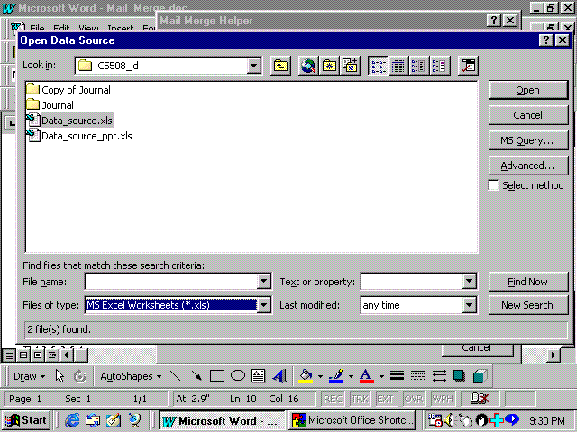
You will be bounced into a familiar Windows file selection box.
Be patient afer you do this. Mail Merge takes over and performs many behind-the-scene functions that enable Mail Merge to occur.
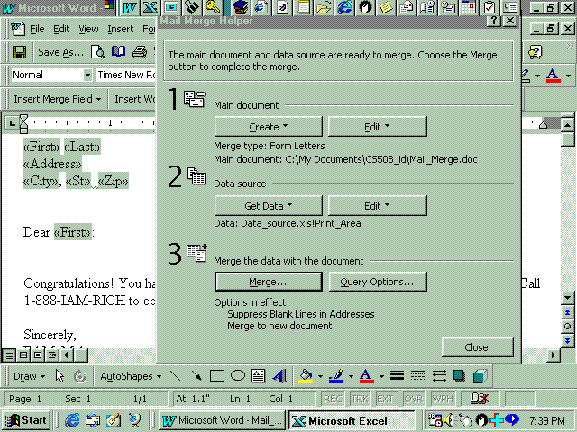
The Merge dialog box will appear waiting for your choice of output
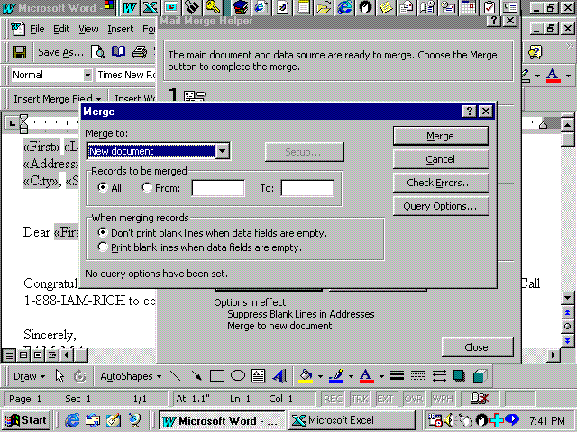
Select the destination of the new Mail Merge document output.
© 2002 Lambda International
All rights reserved.
Part of the "A Gentle Introduction" Series
Lambda Sond Building - San Diego, CA 92126
Phone: 1-888-277-LAMP - FAX: (619) 277-LAMF


